PowerPoint to Flash Converter
Convert Your PowerPoint Presentation to Flash with PowerFlashPoint
PowerFlashPoint automatically converts your PowerPoint XP/2002, 2003, 2007, 2010, 2013 & 2016 presentations into a highly compressed interactive content in Flash format. Easily distribute and share converted Flash with worldwide audience. It's the worlds most accurate PowerPoint to Flash converter.
Buy Now Free DownloadAccurate Conversion
Output works exactly like PowerPoint retaining all the special effects
High Speed Conversion
HTML5 output done 5X quicker than in other converters
SCORM /AICC Support
SCORM / AICC compliant interactive HTML5 output support

Create a PowerPoint Presentation with or without Narration
PowerFlashPoint is a PowerPoint plug-in that automatically converts Microsoft PowerPoint presentations to Adobe Flash format. PowerFlashPoint is the easiest and more featured alternative that lets you to create Flash movies without any programming abilities. First step towards developing a Flash slideshow would be creating a PowerPoint presentation.
Convert PowerPoint to Flash
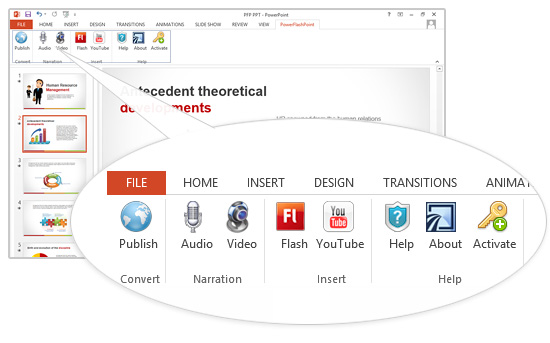
To convert a PowerPoint to flash, all you need to do is to click the publish button provided on the software interface. Once publishing is done you have options to save it on several destinations like CD, My computer, LMS & SlideServe.
You can also upload your output to any website via FTP button provided on the interface.
Publish and Share
Published output in flash format can be shared on websites, blogs or to any social networking sites like Facebook, twitter etc. It can also be uploaded and shared via SlideServe - a revolutionary free service which gives users the power to easily Share, Discover and View PowerPoint presentations Online.

PowerFlashPoint - How it Works
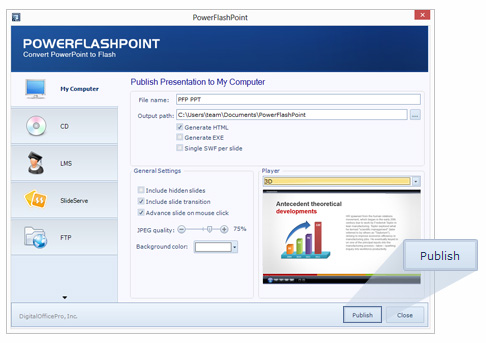
Publish Presentations to My Computer
To publish a presentation to a local computer, follow the steps below:
- 1. From the left pane of PowerFlashPoint window choose the option 'My Computer'.
- 2. Type the name of your output Flash movie in the File name field.
- 3. Specify a local folder path to which you want to save the output, in the Output path.
- 3. Tick the additional output formats you want. There are three additional output options: HTML, EXE and single SWF per slide.
- 3. Click the Publish button to publish your presentation.
Publish Presentations to CD
To publish a presentation to CD/DVD, follow the steps below:
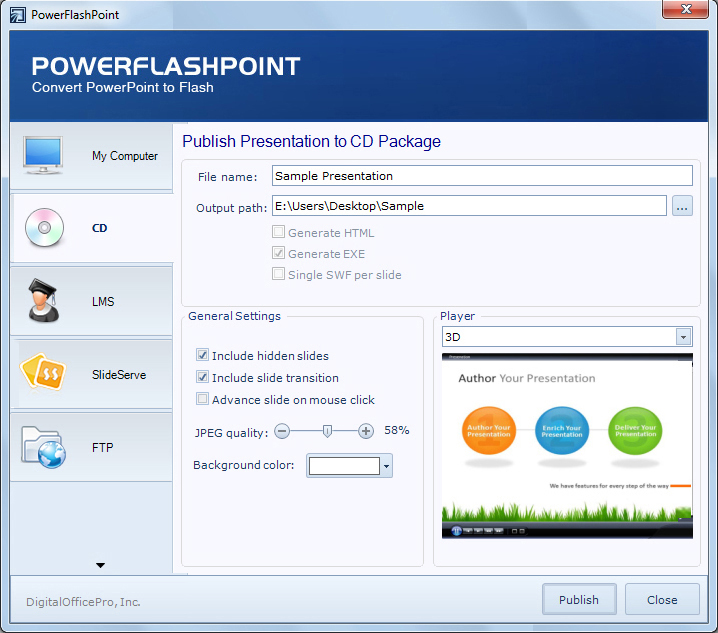
- 1. From the left pane of PowerFlashPoint window choose the option 'CD'.
- 2. Type the name of your output Flash movie in the File name field.
- 3. Specify a local folder path to which you want to save the output, in the Output path.
- 3. Click the Publish button to publish your presentation.
Publish Presentations to LMS
To publish a presentation to LMS, follow the steps below:
- 1. From the left pane of PowerFlashPoint window choose the option 'LMS'.
- 2. Type the name of your output Flash movie in the File name field.
- 3. Specify a local folder path to which you want to save the output, in the Output path.
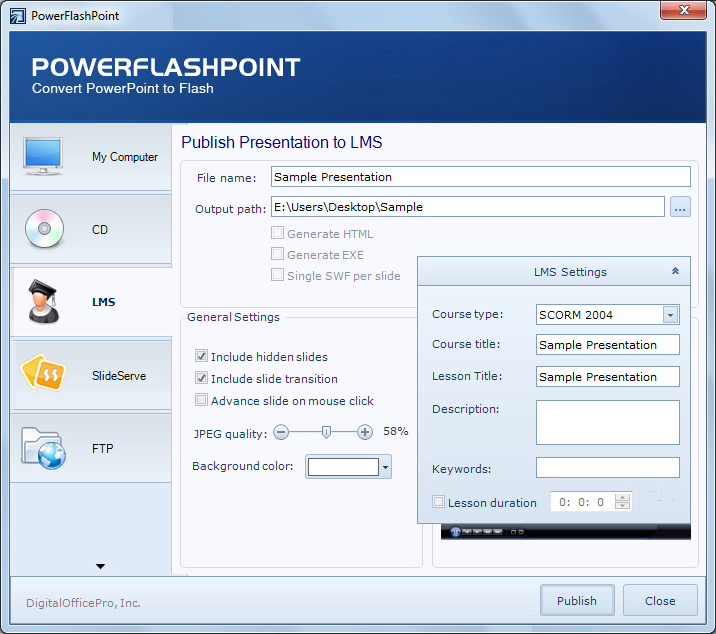
- 4. Click on the LMS Settings button to configure your LMS output. Fill the entire field in the LMS settings. Following are the fields:
-
- Course type: Select the desired type LMS output. User can choose from one of five LMS course types.
- Course title: Enter your LMS course name in the field.
- Lesson title: Enter your course lesson name in the field.
- Description: Type a short description about your LMS course.
- Keywords: Type most appropriate tags/keywords about your course. Keywords are comma separated.
- Lesson duration: Mention your lesson duration.
- 5. Click the Publish button to publish your presentation.
Publish Presentation to SlideServe Online
To publish a presentation to SlideServe.com portal, follow the steps below:
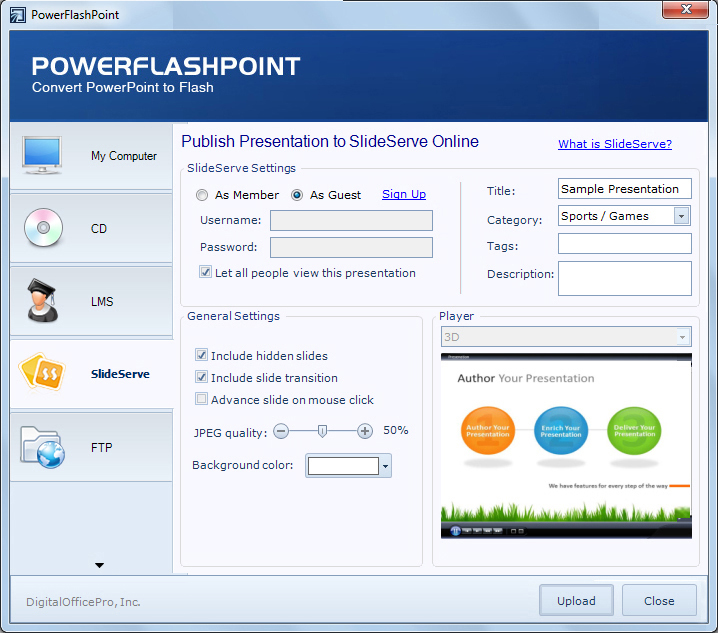
- 1. From the left pane of PowerFlashPoint window choose the option 'SlideServe'.
- 2. There are two SlideServe uploading options: As Member and As Guest.
You are already a SlideServe user, choose the option 'As Member' and enter your SlideServe username and password. If you do not have a SlideServe account please select 'As Guest' option. - 3. Tick on the option 'Let all people view this presentation', if you interested to upload the presentation as publicly in SlideServe online portal. Tick off if you want to upload the presentation as private in SlideServe.
- 4. Fill the field Title, Category, Tags and Description. All the fields are required for uploading presentation to SlideServe.
-
- Title: Enter the presentation title for SlideSeve. Maximum character limit is 60.
- Category: Select a appropriate category for your presentation.
- Tags: Enter one or more tags/keywords, separated by commas.
- Description: Enter a brief description about your presentation. Maximum character limit is 2000.
- 5. Click the Upload button to upload your presentation to SlideServe.com.
Publish Presentation to FTP
To publish a presentation to FTP server, follow the steps below:
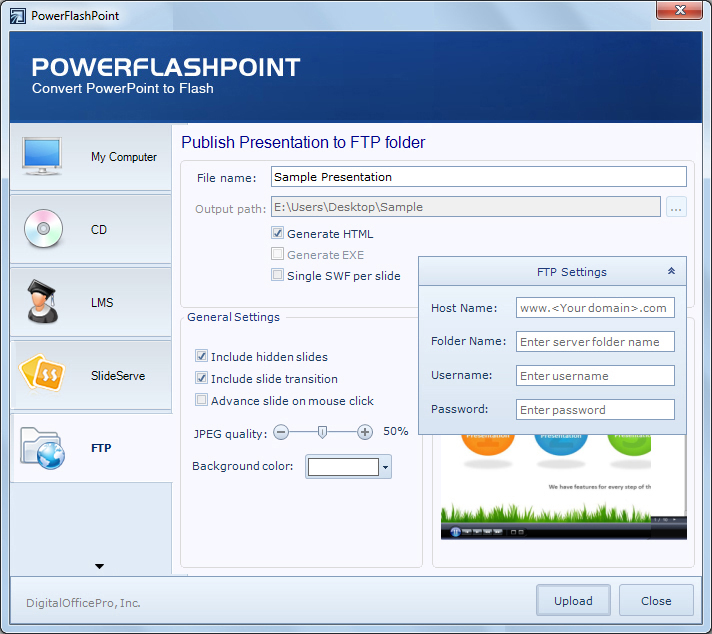
- 1. From the left pane of PowerFlashPoint window choose the option 'FTP'.
- 2. Type the name of your output Flash movie in the File name field.
- 3. Tick the additional output formats you want. There are three additional output options: HTML, EXE and single SWF per slide.
- 4. Click on the FTP Settings button to configure your server details. Fill the entire field in the FTP settings. Following are the fields:
-
- Host Name: Enter your web server host address in the field.
- Folder Name: Enter the name of folder to which the presentation is uploaded.
- Username: Enter your FTP username of your web server.
- Password: Enter your FTP password of your web server.
- 5. Click the Upload button to upload the published presentation to web server.
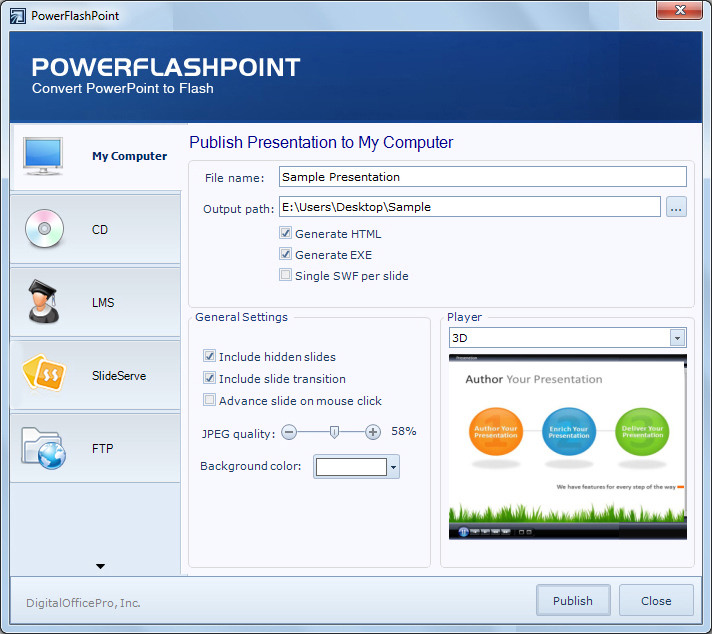
Publishing Options
Configure the publishing options before publishing a presentation. There are two sections for publishing options: General Settings and Player.
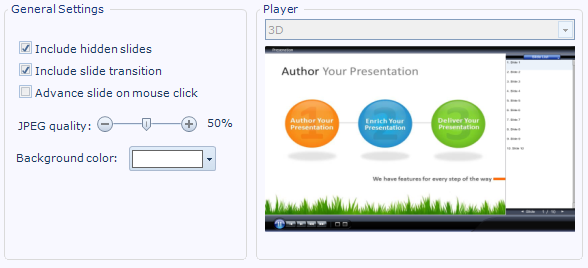
- Include hidden slides : Tick on this option to convert the hidden slides in the presentation.
- Include slide transition : Tick on to retain the slide transitions in the presentation.
- Advance slide on mouse click : If you need advance slide on mouse click, tick on the option.
- JPEG quality : Set the JPEG quality of images present in the presentation.
- Background color : Choose the desired background color for the converted presentation.
- Player : Choose the appropriate output player for your presentation. PowerFlashPoint allows you to choose one of six attractive players depending on your requirements.