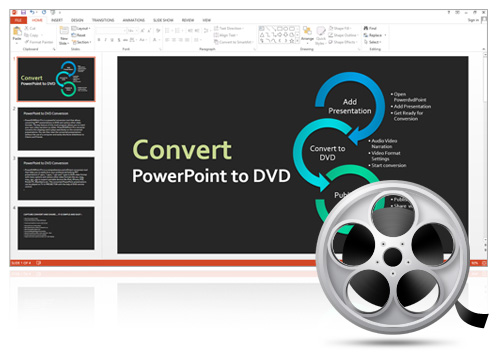
PowerPoint to DVD Converter
Convert your PowerPoint Presentation to DVD and various other video formats
PowerDVDPoint Pro is a powerful conversion tool that allows converting PowerPoint presentations to DVD and various other video formats. The key feature of this multi program allows you to insert your own video narration on slides. PowerDVDPoint Pro converter converts this clippings and it plays seamlessly on the converted presentations.
DownloadAccurate Conversion
Retains animations, transitions, narrations & special effects
Compressed Output
Supports AVI, WMV, MOV, FLV, MPEG, iPad, iPhone, Pocket PC etc
Batch Conversion
Supports batch conversion to save your time.
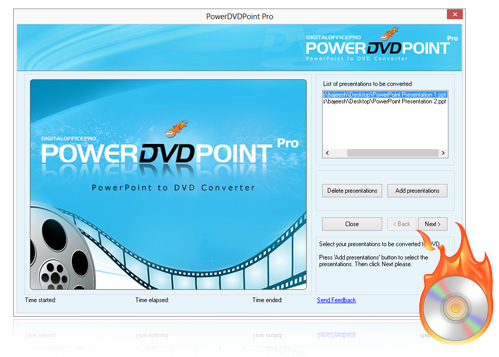
Add Presentation for Conversion
After you purchase PowerDVDPoint Pro or if you are trying a trial version, follow these steps to start using the program for converting PowerPoint presentations to video formats. Install the software first. Make sure all applications are closed. Disable anti-virus software. Double click on the exe file and follow instructions. After installation is complete, reboot system to update registry settings. Click PowerDVDPoint desktop icon -> Select and click on 'Add Presentations' button to add your first presentation.
Convert to DVD
Now that you have added your presentations to PowerDVDPoint interface, all you need to do is to follow the wizard to select the options you would prefer to use. Options are provided to choose the output path, video format type, video resolutions settings etc. Make sure Windows Media Player or some other Media Player is installed on your PC to play the converted output.
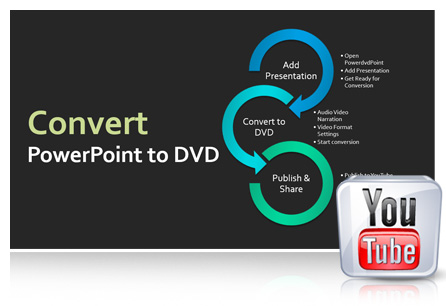
Convert to DVD
Enjoy the maximum of PowerPoint by converting it to DVD and uploading HD content to YouTube. These YouTube videos can further be shared/embedded to popular networking sites like Facebook, Google Plus, Twitter etc. Get that professional edge by viewing PowerPoint presentations as video slide shows with narrations on YouTube.
Let's Start with PowerDVDPoint
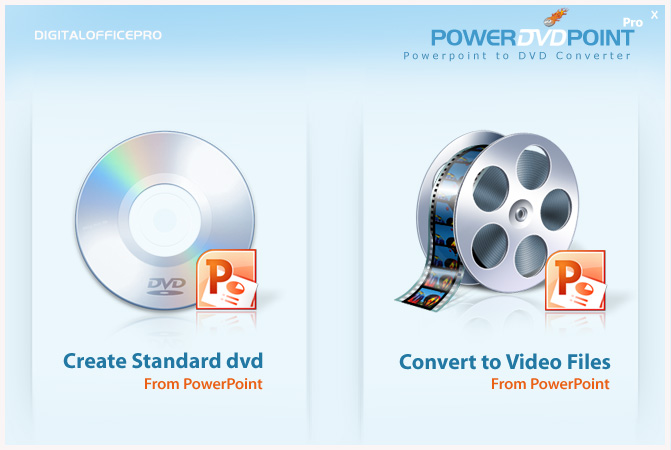
To start the program either double click on this icon or go to start\Program Files\DigitalOfficePro\ PowerDVDPoint Pro and click on PowerDVDPoint Pro. This will initialize the program and you will get the PowerDVDPoint Pro interface listed allowing you to select the conversion type.
To convert presentations to DVD video format select the Create Standard dvd option. On selecting this option, you get this screen.
Add Presentation in PowerDVDPoint
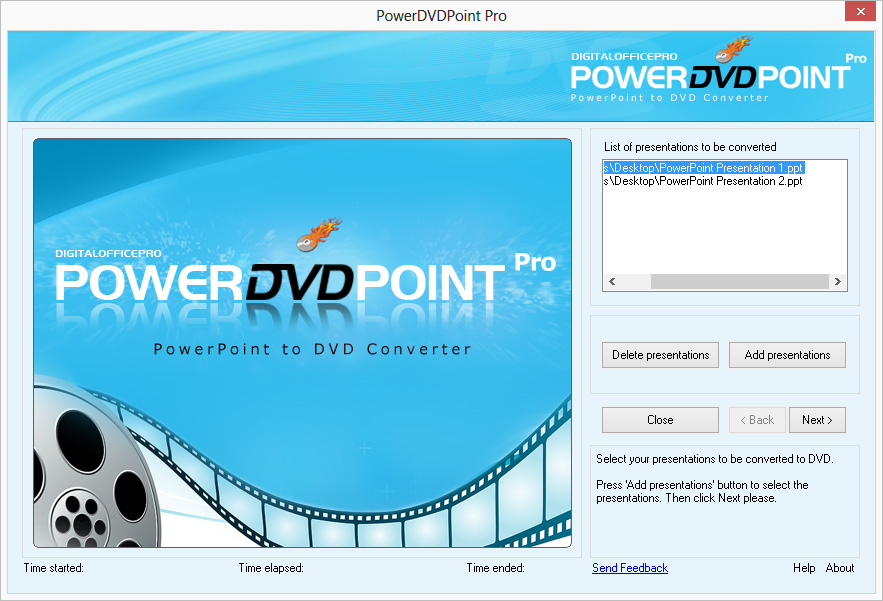
Select and click on ADD PRESENTATIONS button. This will allow you to select the PowerPoint presentations to be converted to video format.
Select the presentations to be converted and click on OPEN button.
Presentations to be converted are listed in PowerDVDPoint interface. Now click on NEXT button.

Choose Output Location
Click on the BROWSE button and select a location to save the converted presentations. Then select NEXT button.
Configure Conversion Settings
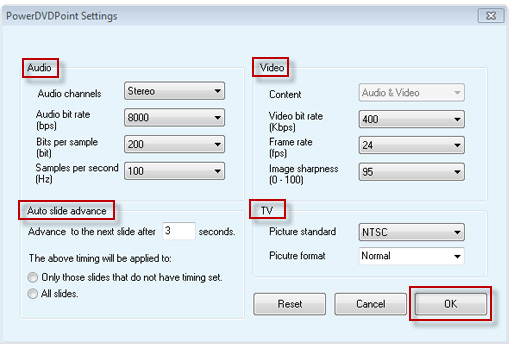
Click on the SETTINGS button to edit PowerDVDPoint Settings.
Here you can modify settings for Audio, Video, Auto slide advance and TV settings.
After modifying settings, click on OK button. Again click on NEXT button. This will open up the PowerDVDPoint Menu Designer settings window.
CMenu Designer Settings
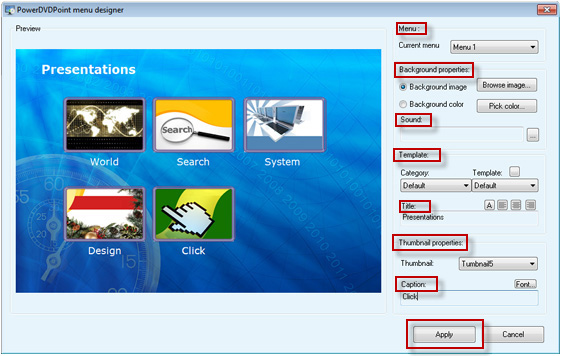
The Menu Designer Settings allows you to edit the following options:-
Background Properties : You can browse / select and apply a Background Image or Color for the Root menu of DVD player.
Sound : Allows you to select and play a sound effect for the Root menu of DVD player. Currently it supports MP3 format only.
Template : You can select and apply a Template file from the drop down list (as the background effect) for the Root menu of DVD player.
Title : Provide a Title for the DVD menu, change Fonts and option to Align the Title Text.
Thumbnail Properties : Option to select thumbnails and give a Caption / Title to each presentation and modify Font of each Caption / Title Text.
After making the modifications, click on CREATE button and then the OK button.
Click on NEXT button which will list the PowerDVDPoint Audio properties message box. Follow instructions and then click on CLOSE button.
Video Narration Option
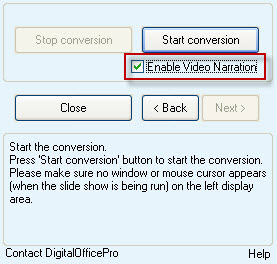
Now select START CONVERSION button to begin the conversion process. Now if you want to insert your Video Narration on slides, tick on - Enable Video Narration option.
Now select START CONVERSION button to insert narration on slides.
The video capturing window is activated for the Web Camera to start Capturing Narrations. Here will see many options on the capturing window.
Show Cam : Tick ON this option to activate web camera
Set Position : Tick ON this option to set camera position
Settings : You can change camera setting properties here
Start / Pause : Select this option to start or pause the narration process
Next :Select this option to play the effects applied on slides and to advance slides
Cancel Conversion : To cancel conversion process
Select the Start option to begin narration using a microphone. Then select Next to play the effects applied on slides and to advance slides. Make sure you select Next option to play each and every effect applied on slides. [You can coordinate between narration and effects applied on slides. Depending on narration you can click on Next to get the animation effects to play on slides and then slide advancement]. Repeat steps to insert video narration on other presentations.
Converting to DVD
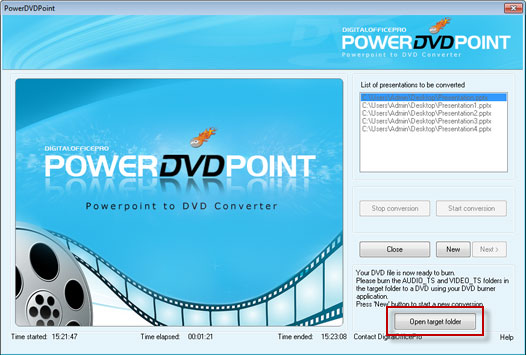
Once narration is completed, you will notice the presentations getting converted and video files generated. After video generation you will see this conversion completed message. Select OK. On selecting OK, you get this message.
Select Open Target Folder button to view the converted files and the target folder. Burn both the listed folders to DVD disk to play on third party hardwares. To play the converted presentation on your PC double click the VIDEO_TS folder to list the files. Select and double click the VTS_01_0.IFO file and the presentation will start playing. (Make sure a DVD software player is installed on your PC). To Exit from PowerDVDPoint interface click on Close button and the application is closed.